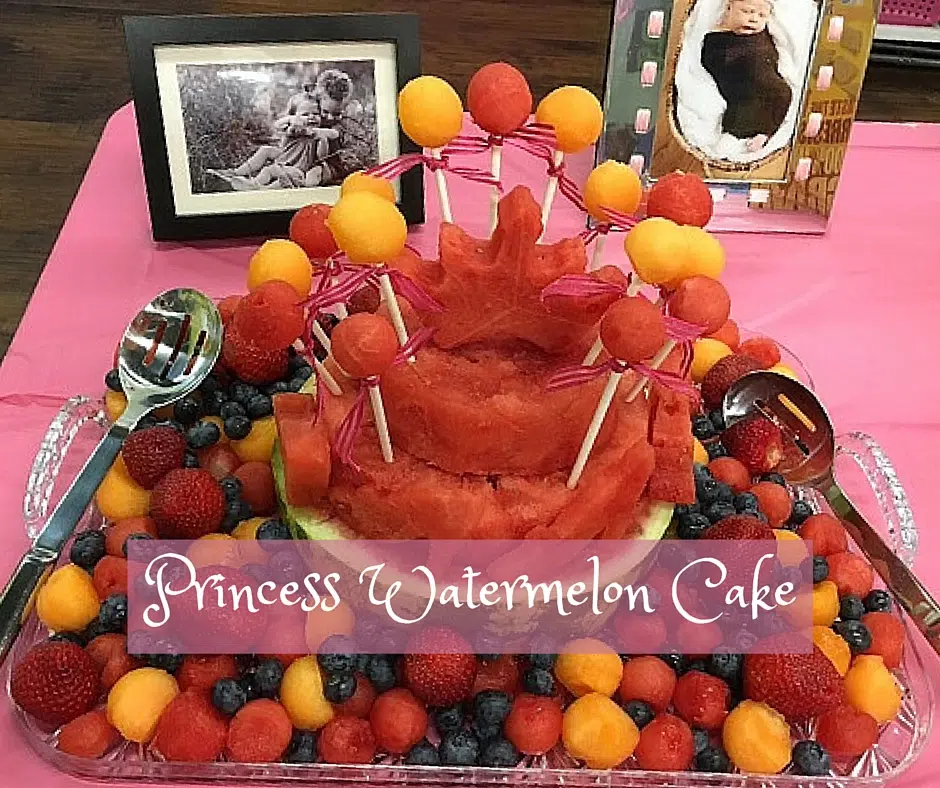
My daughter is the stereotypical girlie-girl. Princesses, painted nails (when I give in and oblige to do so), everything must be pink. Her third birthday was this month and it was no surprise when she requested a princess party. I am a self proclaimed Non Pinterest Mom but lucky for me, I have a super creative mom. She made this Watermelon Princess Cake and it is too cute not to share it with you all. She claims it was super easy! So, go ahead and give it a try. I would love to hear how it turns out!

You’ll need:
- Large Watermelon
- Petite Watermelons and Tuscan Melons or Cantaloupe for the other melon balls
- Sharp knife
- Melon baller and/or small food scoop
- Cookie cutters (crown shape is cute!)
- Lollipop sticks
- Wooden skewers to hold the layers together and to hold the crown on the top
- Small ribbon for bows
Instructions:
- Slice both ends from the large watermelon (so the ends will be flat and not roll around).
- Slice the body of the melon into three pieces of equal thickness.
- Place one section on a cake stand – this will be the bottom tier of the cake. The rind will stay on this layer. Set aside.
- To make the next two tiers, use two small bowls (one must be smaller than the other), trace the outline of each bowl on the surface of the two remaining pieces, and then cut out the circles.
- Place the larger of the circles on the top of the bottom tier of the cake and add the smallest tier to the top of that one.
- Take the petite watermelons, canteloupe, and melon baller to make balls (as many as you want) for balloons/flowers/lollipops (whatever you want to call them). Tie a bow or ribbon on them for additional decoration, if desired.
- Place them (the things on the lollipop sticks!) around the cake.
- If you have a cookie cutter (crown, shoe etc), use left over watermelon to make those to also stick around the cake. Optional but super cute.
- Complete the cake by adding fruit all around the bottom of the “cake.”


